

Posted by Editorial Team
on October 24, 2026

Last Updated: October 23, 2026
Quick Summary
How to repair and mend worn family loungewear involves learning basic hand-stitching techniques, using fabric patches, and applying methods suited to your specific damage like holes, rips, or worn seams. You'll need essential supplies like needles, matching thread, fabric scissors, and patches to extend the life of your family's favorite pieces.
- Gather essential supplies including hand sewing needles, matching thread, fabric scissors, needle threader, thimble, and fabric patches before starting repairs.
- Patch worn knees by cutting a patch 1-2 inches larger than the damaged area and stitching around the entire perimeter with small, tight stitches spaced 1/8 inch apart.
- Use the ladder stitch for nearly invisible repairs on seams and the whip stitch for attaching patches securely to loungewear fabric.
- Maintain elasticity on stretchy fabrics by using loose thread tension, polyester thread, and flexible patches instead of rigid iron-on patches.
Table of Contents
- Why Repairing Family Loungewear Matters
- Clothing Repair Tools and Supplies You'll Need
- How to Patch Worn Knees in Pants
- Repairing Holes and Rips in Loungewear Fabric
- How to Mend Stretchy Fabric Without Losing Elasticity
- Best Stitch for Repairing Clothes: Hand-Stitching Techniques
- Fixing Loose Seams and Split Seams
- Replacing Missing Buttons and Fasteners
- Frequently Asked Questions
Why Repairing Family Loungewear Matters
Worn family loungewear doesn't have to end up in the trash.
Most families don't realize that simple repairs can add months or years to their loungewear. A small hole, a loose seam, or worn knees are fixable problems.
The good news: you don't need advanced sewing skills to repair family loungewear. Basic hand-stitching, patching, and button replacement are learnable techniques that take less time than you'd think.
Here's what we'll cover: the essential tools you need, step-by-step repair methods for common damage, and techniques that work specifically for stretchy fabrics. Learn more about our comfortable loungewear collections
Clothing Repair Tools and Supplies You'll Need
Before you start any repair, gather the right tools. You don't need much, but having quality basics makes the work easier and faster.
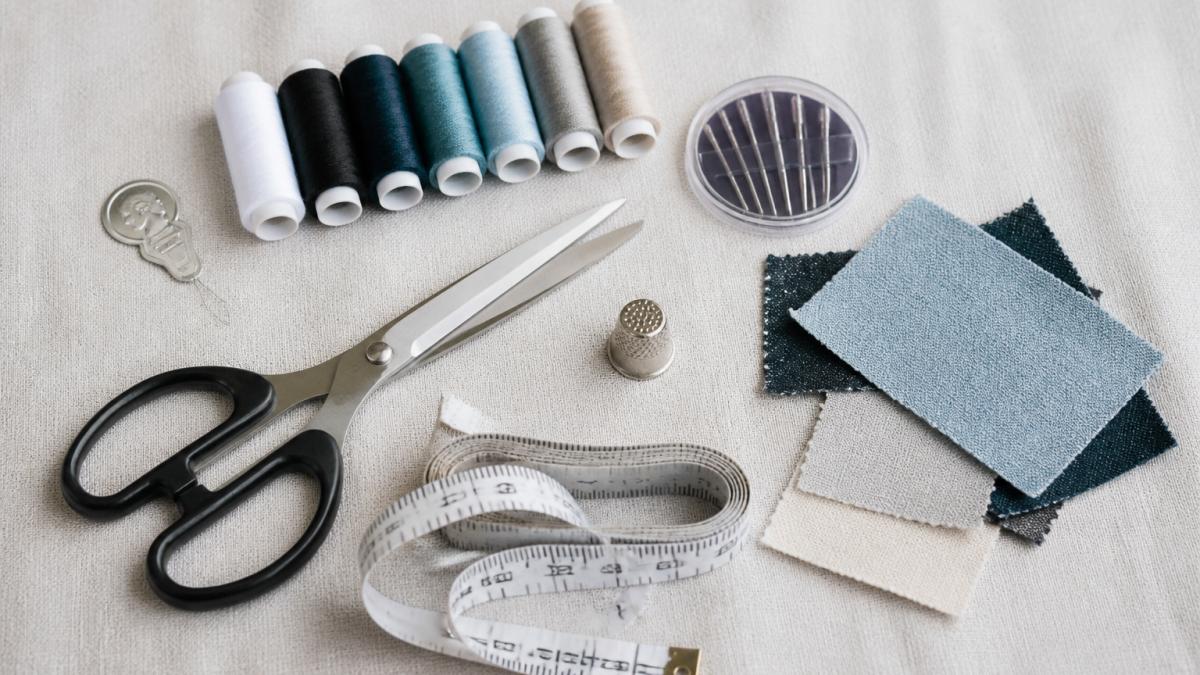
Essential supplies for loungewear repairs:
- Hand sewing needles (various sizes)
- Thread in multiple colors
- Fabric scissors (sharp, dedicated to fabric only)
- Needle threader
- Thimble
- Measuring tape
- Pins or safety pins
- Fabric patches (iron-on or hand-stitched)
- Seam ripper (for removing old stitches)
Hand sewing needles come in different sizes. Smaller needles work better for fine fabrics and detailed work. Larger needles suit thicker materials. Keep a variety on hand.
Thread color matters more than people think. Match thread to your loungewear fabric whenever possible.
Fabric scissors should be sharp and used only for fabric. Using them on paper dulls the blades quickly.
A needle threader saves frustration and time. These inexpensive tools guide thread through the needle eye, which is especially helpful if you have vision challenges.
Gather these essential supplies before starting any loungewear repair.
| Supply | Purpose | Key Detail |
|---|---|---|
| Hand sewing needles | General stitching | Various sizes for different fabrics |
| Thread in multiple colors | Stitching repairs | Match shade to fabric or choose darker |
| Fabric scissors | Cutting patches and fabric | Use only for fabric to keep sharp |
| Needle threader | Threading needles | Saves time and helps with vision challenges |
| Thimble | Finger protection | Protects when pushing through thick fabric |
| Fabric patches | Reinforcing worn areas | Iron-on or hand-stitched options |
| Seam ripper | Removing old stitches | Needed for seam repairs |
How to Patch Worn Knees in Pants
Worn knees are one of the most common loungewear problems, especially in kids' clothing. Knees get thin from repeated sitting, crawling, and play. Patching worn knees before they tear completely prevents larger damage.
Steps for patching worn knees:
-
Assess the damage. Look at both sides of the knee area. If the fabric is thin but not yet torn, you can patch it now. If there's already a hole, you'll still use this method.
-
Cut a patch. Cut a fabric patch slightly larger than the worn area, about 1-2 inches beyond the damage on all sides. Use matching fabric if you have scraps, or choose a complementary color that complements your loungewear.
-
Position the patch. Place the patch on the inside of the pant leg, centered over the worn area. Pin it in place with several pins to keep it steady while you stitch.
-
Stitch around the edges. Using a needle and thread, stitch around the entire perimeter of the patch with small, tight stitches. Space stitches about 1/8 inch apart. Stitch through both the patch and the pant fabric.
-
Check the outside. Flip the pant leg to the outside and inspect your work. The patch should hold firmly and the worn area should feel reinforced.
For extra durability, add a second row of stitches just inside the first row. This creates a strong bond between patch and fabric. If you prefer not to see stitches on the inside, iron-on fabric patches work too, though hand-stitched patches typically last longer.
Repairing Holes and Rips in Loungewear Fabric
Small holes and rips need quick attention before they spread. A 1-inch hole can become a 4-inch tear with a few washes if left unrepaired.
For small holes (less than 1 inch):
The simplest approach is a small patch on the inside. Cut a patch about 1 inch larger than the hole on all sides.
For rips along seams:
Rips that follow a seam line need different handling. Open the seam slightly using a seam ripper. Remove any old thread.
For rips in the middle of fabric:
These rips need a patch on both sides for strength. Cut two patches slightly larger than the rip.
Visible rips on the outside of loungewear can become decorative repairs. Some families embrace visible mending by using contrasting thread or decorative stitches.
How to Mend Stretchy Fabric Without Losing Elasticity
Stretchy fabrics in loungewear, like spandex blends and knit materials, require special care during repairs.
Best practices for stretchy fabric:
Avoid pulling thread too tightly when stitching. Learn how to maintain softness in kids clothing while keeping fabrics in great condition.
Use thread that has some give. Polyester thread works better than cotton on stretchy fabrics because it has slight elasticity.
Consider the stitch type.
Textile care guidelines from the Smithsonian Institution recommend testing repairs on hidden areas first.
For patches on stretchy fabric, use a flexible patch material. Knit patches or stretchy fabric patches work better than rigid woven patches.
Never use stiff iron-on patches on stretchy loungewear.
Best Stitch for Repairing Clothes: Hand-Stitching Techniques
The right stitch makes repairs invisible or intentional, depending on your goals. Different stitches suit different repairs. Learning a few basic stitches gives you options for almost any loungewear problem.
The Ladder Stitch for Seamless Repairs
The ladder stitch creates nearly invisible repairs on seams and fabric damage. This stitch works by running thread through the folded edges of fabric, creating a seam that looks like it was never torn.
How to do the ladder stitch:
-
Align the torn edges. Bring the two torn edges of fabric together as if the tear never happened. Pin them in place if needed.
-
Thread your needle. Use thread that matches your loungewear. Tie a knot at the end.
-
Start inside the seam. Push your needle through one folded edge of fabric, starting from inside the fold. Bring the needle out about 1/8 inch along the fold.
-
Cross to the opposite edge. Move directly across to the opposite folded edge. Insert the needle into the fold and run it along the inside for about 1/8 inch, then bring it back out.
-
Repeat the pattern. Continue alternating between left and right edges, always staying inside the folds. The thread creates a ladder pattern inside the fabric.
-
Pull gently. Every few stitches, gently pull the thread. The two edges will draw together, creating a seam that looks professionally finished from the outside.
The ladder stitch takes practice but produces repairs that look like the fabric was never damaged. This stitch works beautifully on seams, small holes, and rips in loungewear.
The Whip Stitch for Patch Attachment
The whip stitch secures patches to fabric with strong, durable stitches that won't pull loose. This stitch is perfect for attaching fabric patches to worn areas.
How to do the whip stitch:
-
Position your patch. Place the patch over the damaged area on the inside of your loungewear. Pin it securely.
-
Start at a corner. Bring your needle up through the patch and fabric, starting at one corner of the patch.
-
Make angled stitches. Move your needle diagonally across the corner of the patch, about 1/4 inch. Push the needle back down through both layers.
-
Bring the needle back up. Emerge about 1/8 inch along the edge of the patch. Repeat the diagonal stitch.
-
Continue around the perimeter. Work your way around the entire patch edge, keeping stitches small and consistent.
The whip stitch creates a strong bond between patch and fabric. Stitches are visible from the inside but hidden from the outside, making this ideal for practical repairs on loungewear.
Fixing Loose Seams and Split Seams
Loose seams unravel quickly and create bigger problems if not addressed. A loose seam can become a split seam within a few washes.
For loose seams:
Locate the loose thread and trace it back to where the seam is separating.
Align the seam edges carefully. Using matching thread, stitch the seam back together with small, tight stitches. Space stitches about 1/8 inch apart.
For split seams:
A split seam happens when the fabric itself tears along a seam line. This requires reinforcement beyond simple restitching.
Check seams regularly on frequently-worn loungewear. Catching problems early makes repairs quick and easy. Seams on shoulders, underarms, and crotch areas experience the most stress and deserve extra attention.
Replacing Missing Buttons and Fasteners
Missing buttons make loungewear unwearable. Button replacement is one of the easiest repairs and takes only a few minutes.
Steps for replacing a button:
-
Thread your needle. Use thread that matches the button or the loungewear. Tie a knot at the end.
-
Bring the needle up through the fabric. Push your needle up through one hole of the button from the underside of the fabric.
-
Push the needle back down. Move diagonally across to the opposite hole and push the needle back down through the fabric.
-
Repeat the pattern. Bring the needle back up and repeat, creating an X pattern through the button holes. Make 4-6 passes for strength.
-
Secure the thread. Bring your needle to the back of the fabric and tie a knot. Trim excess thread.
For two-hole buttons, use the X pattern. For four-hole buttons, create two X patterns or stitch parallel lines through the holes. Either method works well.
Use thread that's slightly thicker than regular sewing thread for button attachment. This creates stronger stitches that resist pulling loose. If you don't have button-specific thread, use two strands of regular thread instead of one.
Frequently Asked Questions
What is the best stitch for repairing clothes?
The ladder stitch (also called the invisible stitch) is ideal for sealing holes and rips with minimal visibility. For attaching patches, the whip stitch provides durability and a neat finish. The running stitch works well for reinforcing seams. Choose based on your repair type: ladder stitch for invisible mends, whip stitch for visible patches, and running stitch for seam reinforcement. Practice on scrap fabric first to build confidence.
How do you mend a hole in stretchy fabric like loungewear?
Use a flexible thread and the ladder stitch to maintain elasticity. Place a knit fabric patch behind the hole, then stitch around the perimeter using small, close stitches. Avoid pulling too tightly, which can pucker the fabric. For small holes, a needle-and-thread ladder stitch alone may suffice. For larger damage, combine a patch with the ladder stitch for durability. Stretchy fabrics require patience but repair beautifully with the right technique.
Can worn knees in loungewear be patched?
Yes, worn knees patch well and can look intentionally decorative. Cut a patch from matching or contrasting fabric slightly larger than the worn area. Apply it using the whip stitch or ladder stitch for durability. Visible mending, where the patch is part of the design, has become popular and extends garment life significantly. This repair works especially well for family loungewear since it blends function with style.
What supplies do you need to mend clothes at home?
Start with needles, thread in multiple colors, small scissors, a needle threader, and fabric patches. Add a thimble for comfort, a measuring tape for accuracy, and pins to hold fabric in place. For no-sew repairs, fabric glue or iron-on patches work quickly. For worn knees and larger repairs, consider fusible interfacing to reinforce patches. Keep supplies in a small sewing kit for easy access when repairs are needed.
Missing buttons, worn knees, and loose seams don't mean your family loungewear is done. These repairs are straightforward and take minimal time. When you keep your favorite pieces in rotation through simple maintenance, you're investing in comfort and quality for your family. Coordinates loungewear is designed to last, and with basic repair skills, you'll keep these pieces looking great for years. Shop our collection of durable family loungewear and discover pieces worth caring for.


